Remove
Select files and click Remove, or right-click and choose Clear file list to remove all files at once.
The File Manager is the central workspace where you select the files to include in your package. It is split into two panels: the Component Manager on the left and the file list on the right.
Click the Add button in the toolbar and choose an option:
*.dll) to match multiple files dynamically.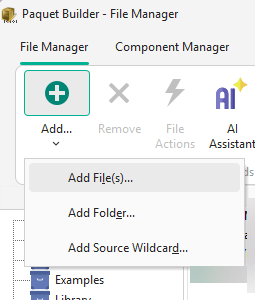
Wildcards let you define masks for files to include. This is useful for dynamic content that changes between builds.
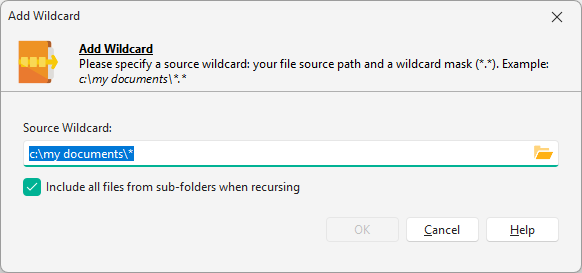
When adding folders or wildcards, you can choose whether to include sub-folders. You can also configure components for live-update to refresh sub-folder contents automatically.
Drag files directly from Windows Explorer into the file list — they are added to the currently selected component.
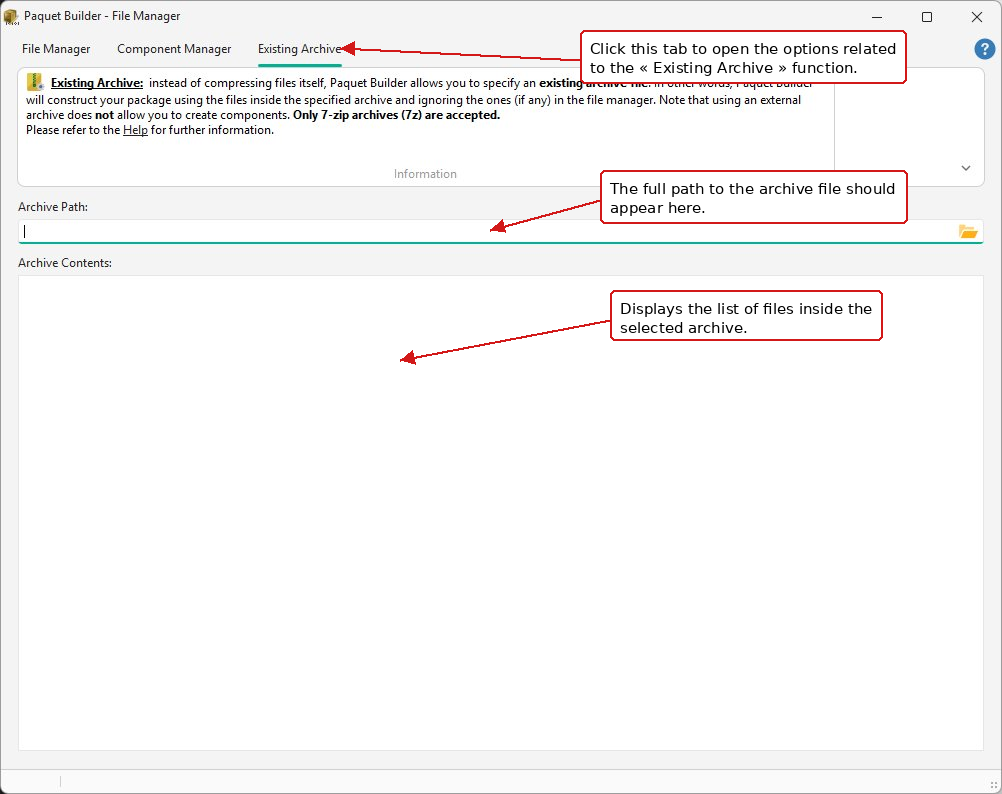
Instead of individual files, you can use an existing 7-Zip archive (.7z) as your package source. Open the Existing Archive tab and specify the archive path:
Remove
Select files and click Remove, or right-click and choose Clear file list to remove all files at once.
Sort and filter
Click column headers to sort by name, type, or size. Use the Filter field to narrow the list (e.g. *.EXE).
Properties
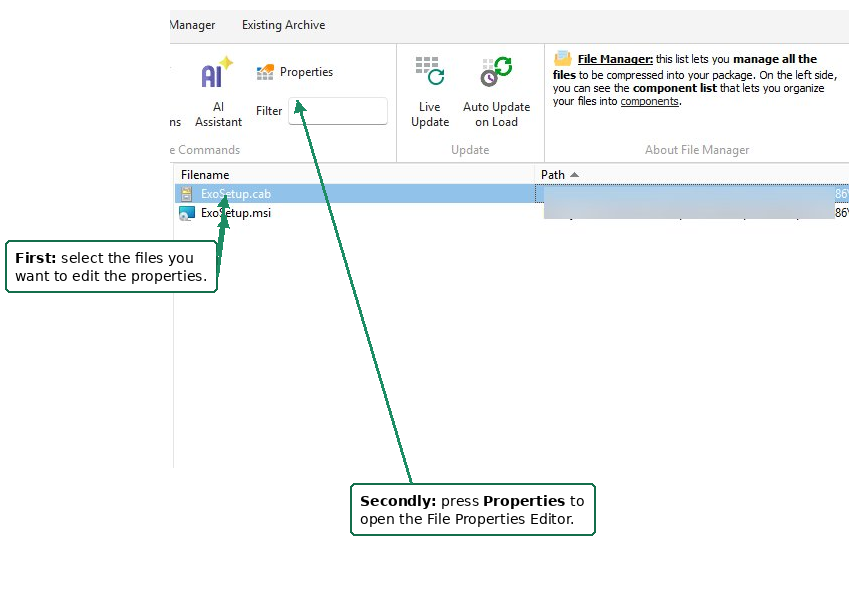
Select one or more files and use the Properties button, context menu, or double-click to edit file properties.
Context menu
Right-click for commands like Select All, File Information, Open, or Create a shortcut to… (editable later in the shortcut manager).
The Component Manager (left panel) lets you organize files into logical groups:
Additional actions:
The File Actions button provides registration options for shared and COM files:
| Action | Description |
|---|---|
| Register as ActiveX / COM Server | Creates a custom action to self-register an EXE or DLL for use by other COM applications. |
| Register as Shared DLL | Creates a custom action to mark the file as shared. During uninstallation, the system checks whether it is still in use before removing it. |