Add / Remove
Click Add Action (Ctrl+A) to insert a new operation. Select an action and press Del to remove it.
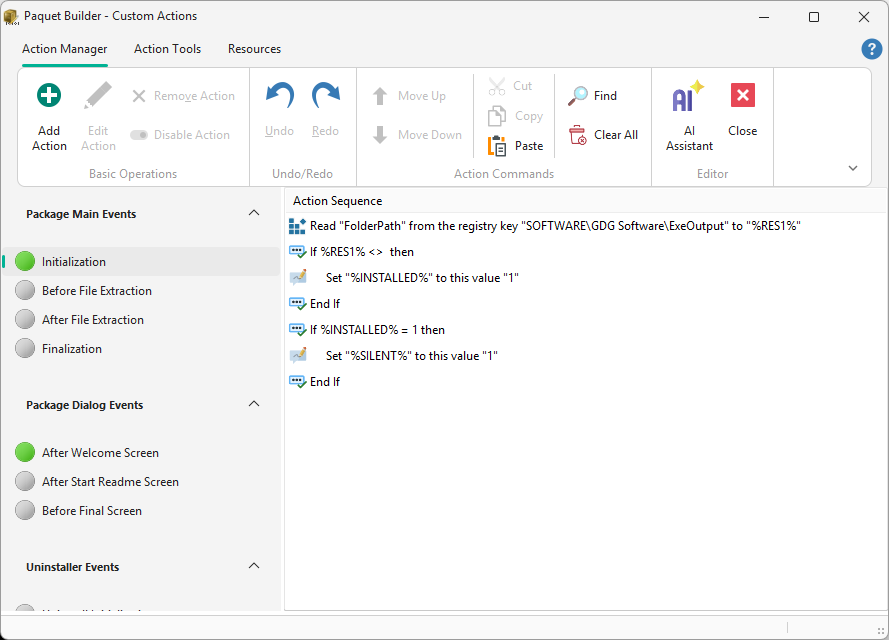
The Custom Action Manager is the primary interface for managing logic and operations in your project.
Add / Remove
Click Add Action (Ctrl+A) to insert a new operation. Select an action and press Del to remove it.
Edit
Double-click any action to open the Action Properties Editor.
Reorder
Use drag-and-drop or the Move Up/Down buttons. Logic executes top to bottom.
Enable / Disable
Toggle the checkbox to bypass an action during compilation. Disabled actions appear crossed out.
Search
Use Find to locate specific text within your action list. Matches are highlighted.
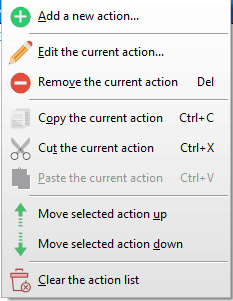
Context menu
Right-click for cut, copy, paste, and additional commands.
Events containing active logic are marked with a green LED. If the LED is off, the event has no custom actions.
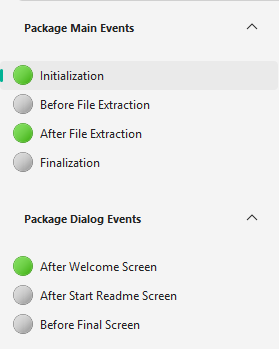
Select an Event: choose the trigger point where the logic should execute.
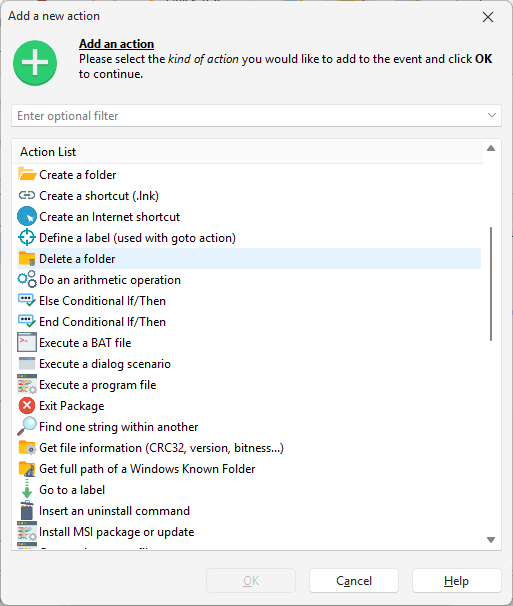
Add the Action: click Add Action, select the desired operation from the list, and click OK.
Configure Properties: use the Properties Editor to set parameters.
Save changes: click OK to return to the manager.
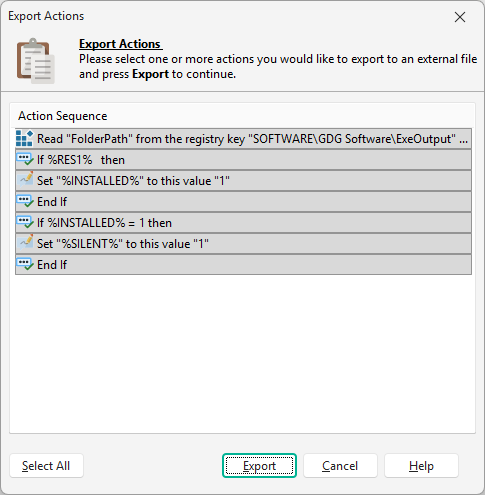
Export
Highlight actions and click Export Actions to save them as an XML file for reuse across projects.
Import
Click Import Actions and select an XML file. Choose which actions to import; they are added without overwriting existing ones.
Copy / Paste blocks
Use Action Tools > Copy Block and Paste Block to duplicate multiple actions simultaneously.
The manager supports up to 30 levels of undo/redo (Ctrl+Z / Ctrl+Y), including reordering, deletions, and changes made by the AI Assistant.
| Shortcut | Action |
|---|---|
Ctrl+A | Add a new action |
Ctrl+C | Copy selected action |
Ctrl+Z | Undo last change |
Ctrl+Y | Redo |
Del | Remove selected action |
Page Down | Jump to next event |