Output directory
Choose the folder where Paquet Builder writes the final package and the temporary build files it needs during compilation.
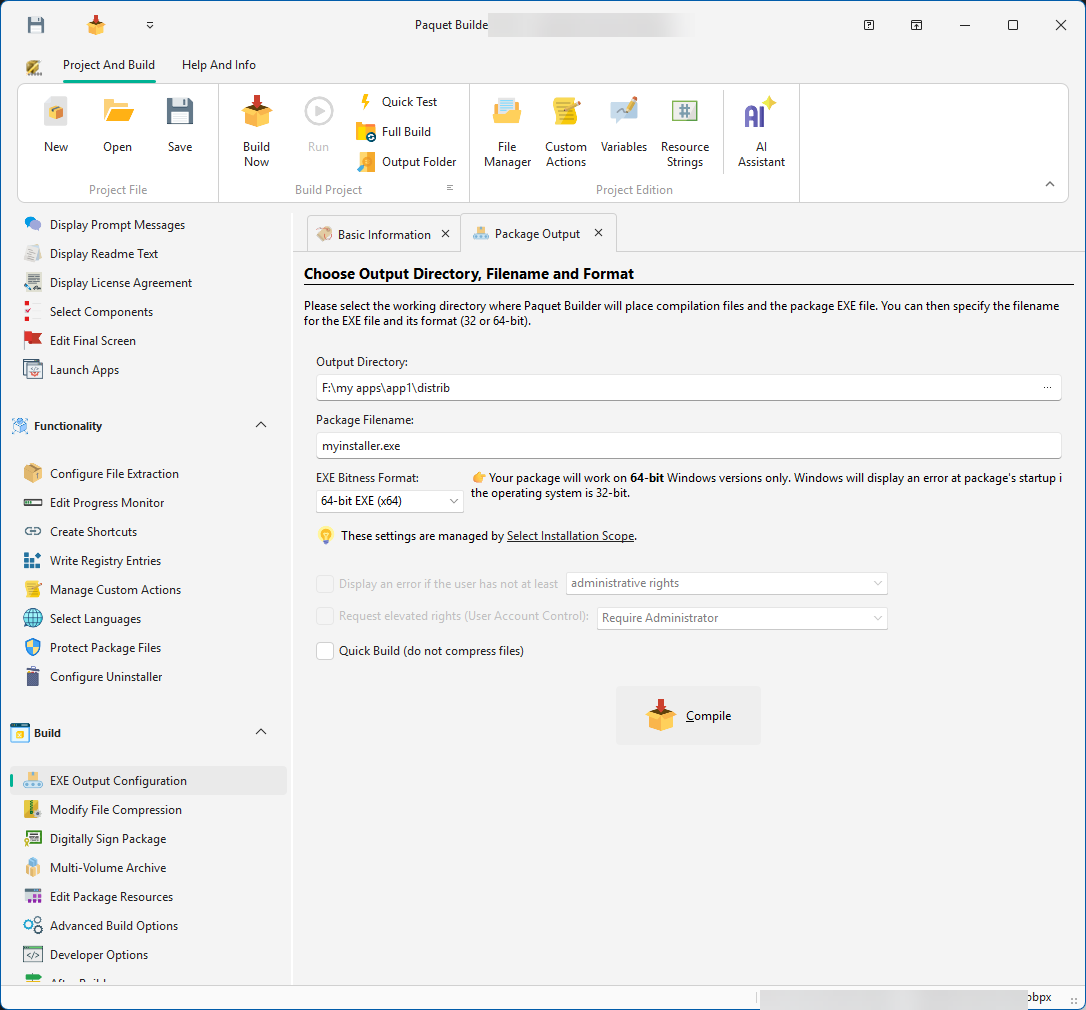
This page controls where the final package is written, which binary format is generated, and how compilation behaves.
Output directory
Choose the folder where Paquet Builder writes the final package and the temporary build files it needs during compilation.
Package filename
Set the output file name. Use .exe for executable packages or .7z for archive output when the project type supports it.
Build trigger
Launch a build immediately from this page with Build Now, keyboard shortcuts, or command-line automation.
Specify the full path to the folder where Paquet Builder should place the package file and its temporary Bin folder. If the target folder does not exist yet, Paquet Builder creates it automatically.
Define the file name without the path. Use an .exe extension for executable packages or .7z for archive output, depending on the project type you created.
Paquet Builder can create x86, x64, and ARM64 packages. Choose the target that matches the software you want to install and the registry view you need to access.
32-bit packages can run on both 32-bit and 64-bit Windows systems. They are the right choice for 32-bit application deployments or when you intentionally want 32-bit registry redirection.
64-bit packages run only on 64-bit Windows. They are typically used when your package installs 64-bit software or must access the native 64-bit registry view directly.
ARM64 packages target Windows on ARM (e.g. Snapdragon) and install native ARM64 software. They also use the native ARM64 registry view. ARM64 packages do not run on x86 or x64 systems.
On x64 Windows, x64 packages write directly to the native 64-bit registry, while x86 packages are redirected under Wow6432Node. See Registry Entries for details.
Bin folder during compilation and removes it afterwards unless you keep it through Advanced Build Options.When building a package, Paquet Builder compresses files into an archive before converting them into a self-extracting executable. Compression is the most time-consuming process.
To save time, Paquet Builder caches the archive in a temporary folder. If the source files and compression settings remain unchanged, the cached archive is reused for subsequent builds.
To force a full archive rebuild, press F10 or choose Build Full Package from the ribbon split button. The cache is cleared automatically when you close Paquet Builder or switch to another project. It is stored in the working folder defined in Environment Options.
Configure how the package requests elevated rights on Windows 7 and later systems.
Enable this option if the package must run only under administrative or power-user rights. This is important for tasks such as modifying protected system areas or writing to privileged registry locations.
For testing purposes, files are not compressed and the package is not digitally signed, even if signing is configured. This is equivalent to clicking Quick Test in the ribbon.
When the project type is 7Z archive (not a self-extracting EXE), the following options are hidden or disabled on this page because they only apply to executable packages:
The page header adapts to show “Choose Output Directory and Filename” instead of the full EXE-oriented heading.
The compilation log shows a detailed, real-time view of the build process:
During compilation, you can cancel the process with the Cancel button in the progress monitor. Cancellation is effective only between compression operations, so it may be unavailable near the end of the build.