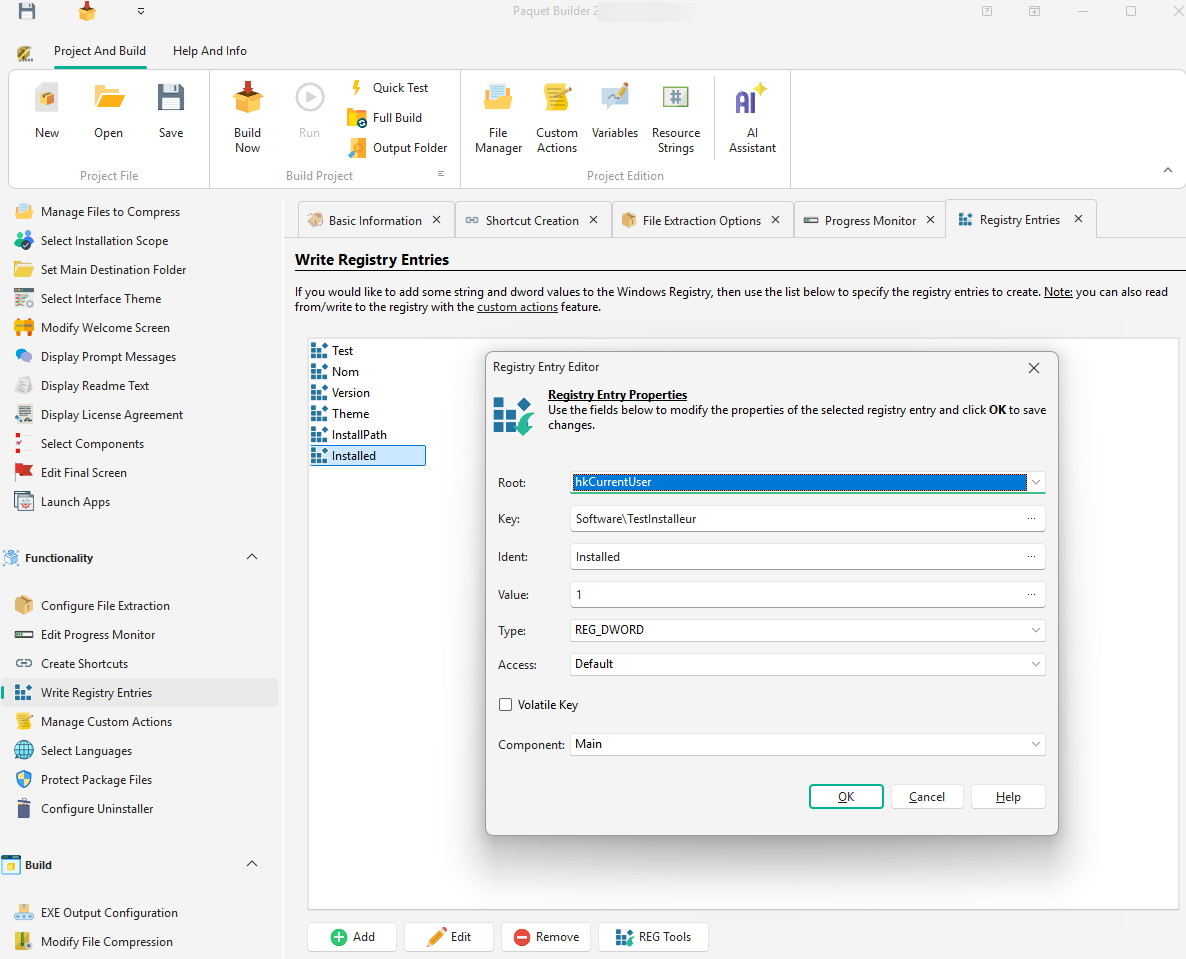
Write Registry Entries
The Registry Entry Manager lets you configure registry entries that your package will create or modify on the destination computer. It provides a visual interface that simplifies what can also be done with custom actions.
Managing Entries
Section titled “Managing Entries”-
Add an entry: Click the Add button to open the entry editor dialog.
-
Edit an entry: Select an entry and click Edit, or double-click the entry directly.
-
Remove an entry: Select an entry and click Remove, or press DEL.
-
Import/Export: Use the REG tools button to import or export
.regfiles.
Import / Export .reg Files
Section titled “Import / Export .reg Files”You can import registry entries from .reg files created with RegEdit (RegEdit.exe).
| Format | Supported |
|---|---|
| REGEDIT 5.0 (Unicode) | Yes |
| REGEDIT 4.0 (Non-Unicode) | Yes |
| Other formats | No |
Only string, dword, and qword values are imported; other entry types are ignored.
Exported .reg files are fully compatible with RegEdit and can be edited with any text editor.
When exporting from RegEdit, select the REGEDIT5 format for best compatibility.
Entry Editor
Section titled “Entry Editor”The registry entry editor allows you to create or modify individual settings. Refer to the Write a registry entry custom action topic for detailed field explanations.
Supported Entry Types
Section titled “Supported Entry Types”| Type | Registry Type |
|---|---|
| String | REG_SZ |
| Expanded string | REG_EXPAND_SZ |
| DWORD (32-bit) | REG_DWORD |
| QWORD (64-bit) | REG_QWORD |
Component Assignment
Section titled “Component Assignment”Each registry entry can be assigned to a component. The entry will only be created if the associated component is selected for installation. Select None to always create the entry.
Accessing an Alternate Registry View
Section titled “Accessing an Alternate Registry View”By default, a 32-bit package accesses the 32-bit registry view on WOW64, while a 64-bit package accesses the 64-bit view. ARM64 packages access the native 64-bit registry view, the same as 64-bit packages.
Custom actions for registry modifications have an Access property to specify the desired view:
| Value | Behavior |
|---|---|
regaDefault | Default behavior based on the package type |
regaWOW64_64KEY | Access a 64-bit registry key from either a 32-bit or 64-bit package |
regaWOW64_32KEY | Access a 32-bit registry key from either a 32-bit or 64-bit package |
Refer to Microsoft Windows documentation for more details.
Important Considerations
Section titled “Important Considerations”Registry entries created through the manager are automatically removed by the uninstaller by default.