Quick Tutorial: Create a Simple Package
Paquet Builder includes many features, so the easiest way to learn it is to build a simple package first. This quick tutorial walks you through the shortest path from a blank project to a working .exe.
Goal: add source files to a package and compile the final output.
-
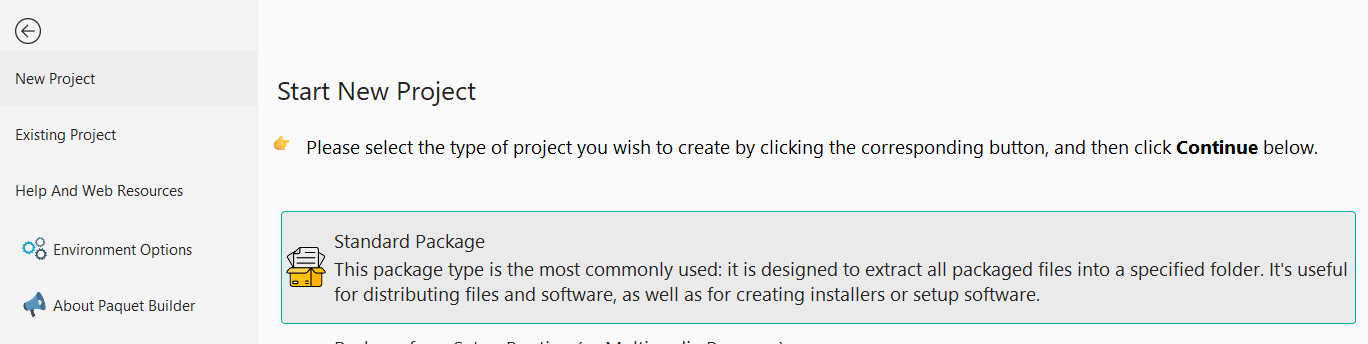
Start Paquet Builder and create a new project
Open Paquet Builder. On the Home screen, click New Package.

Select Standard Package, the most common type, used to extract files into a specified folder. Then click Continue.
-
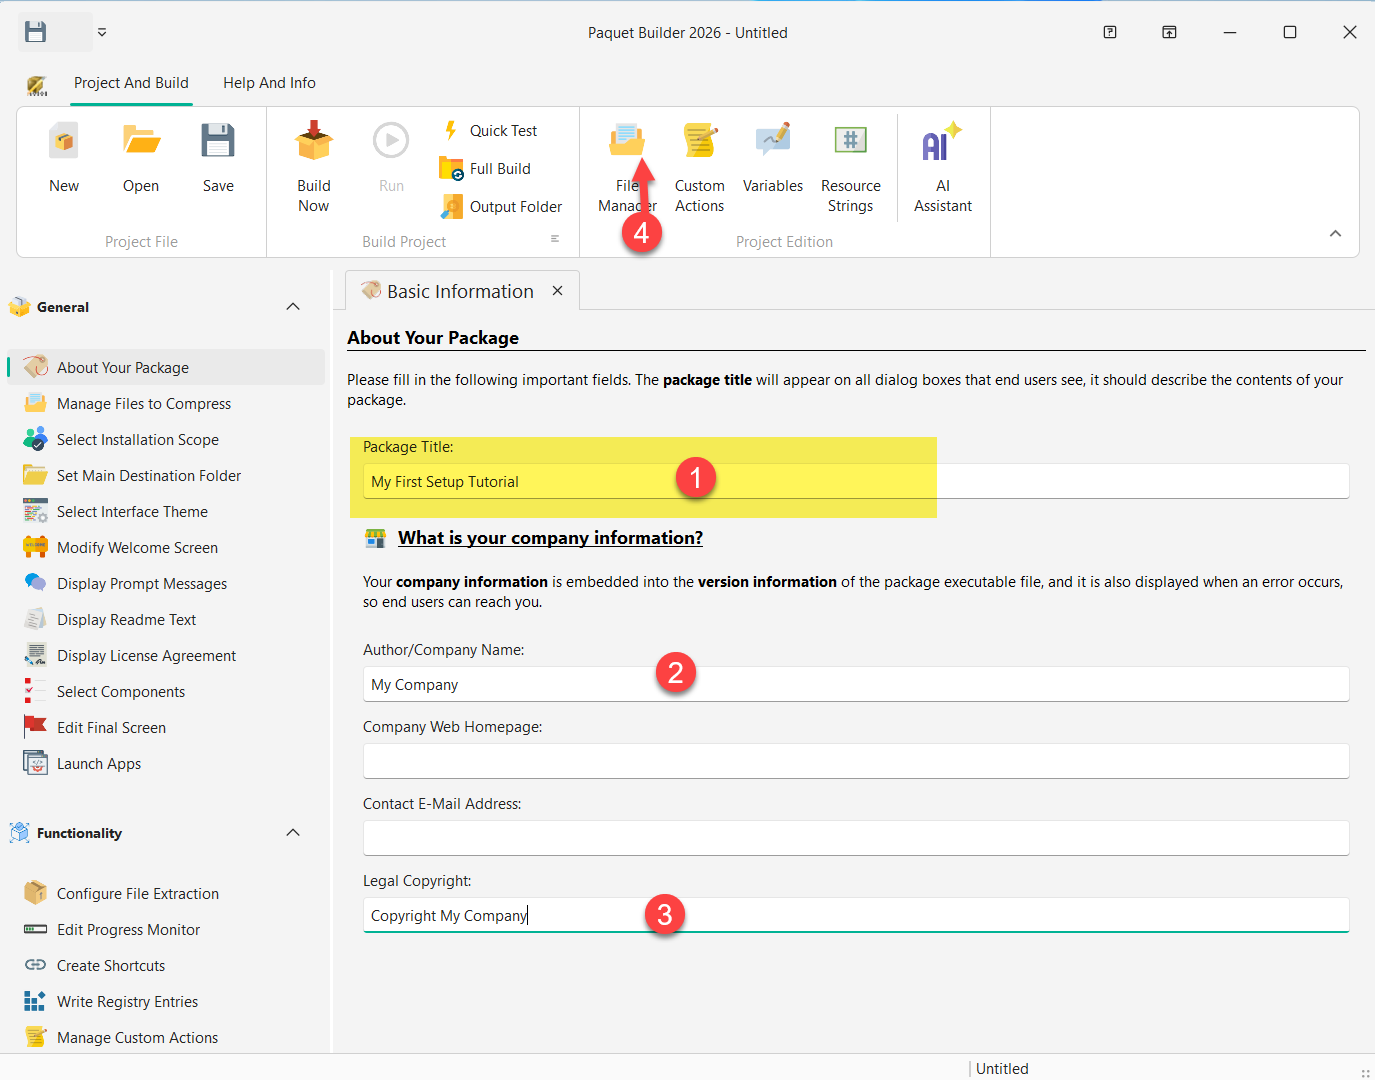
Enter a package title
The project opens on the About Your Package page. Fill in the Package Title (e.g. My First Setup Tutorial) and optionally the Author/Company Name and Legal Copyright fields. This information is embedded in the executable’s version metadata.
Use the File Manager button in the toolbar to open the File Manager at any time.
-
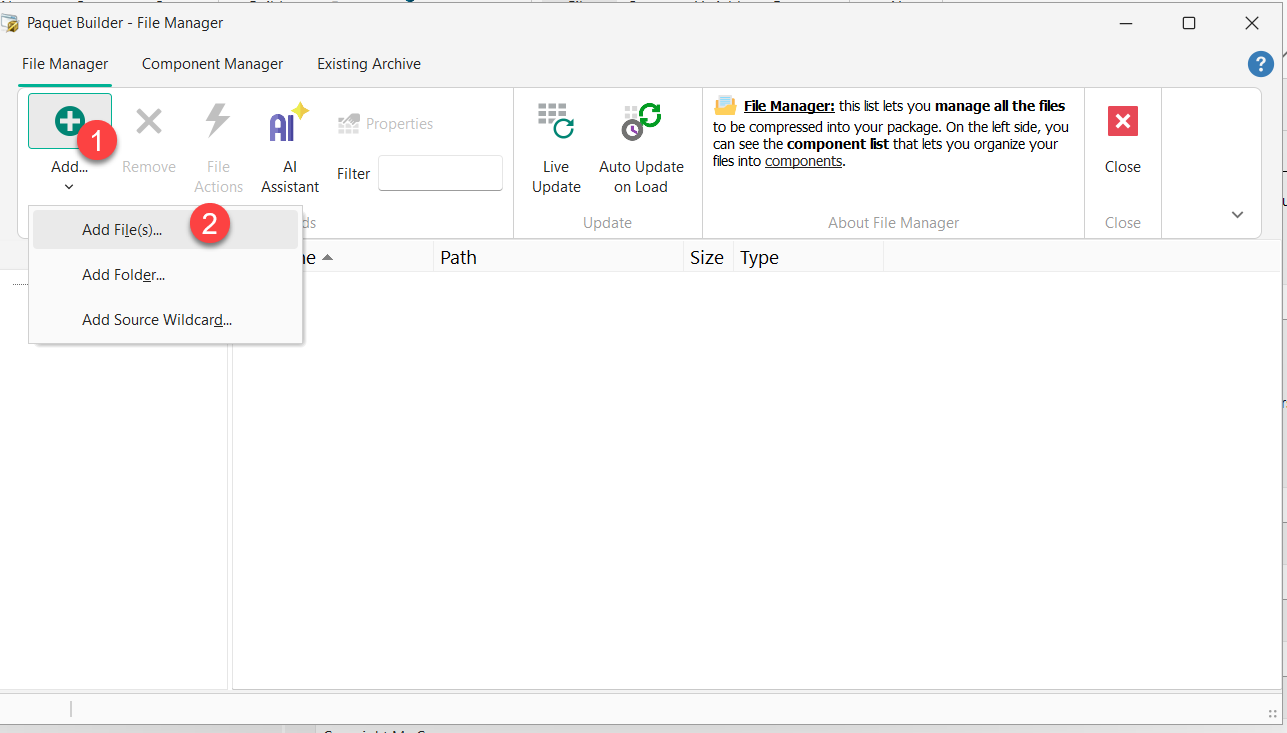
Add the files you want to distribute
In the File Manager, click Add then choose Add File(s) to browse for individual files, Add Folder to include an entire directory, or simply drag files from Windows Explorer into the list.
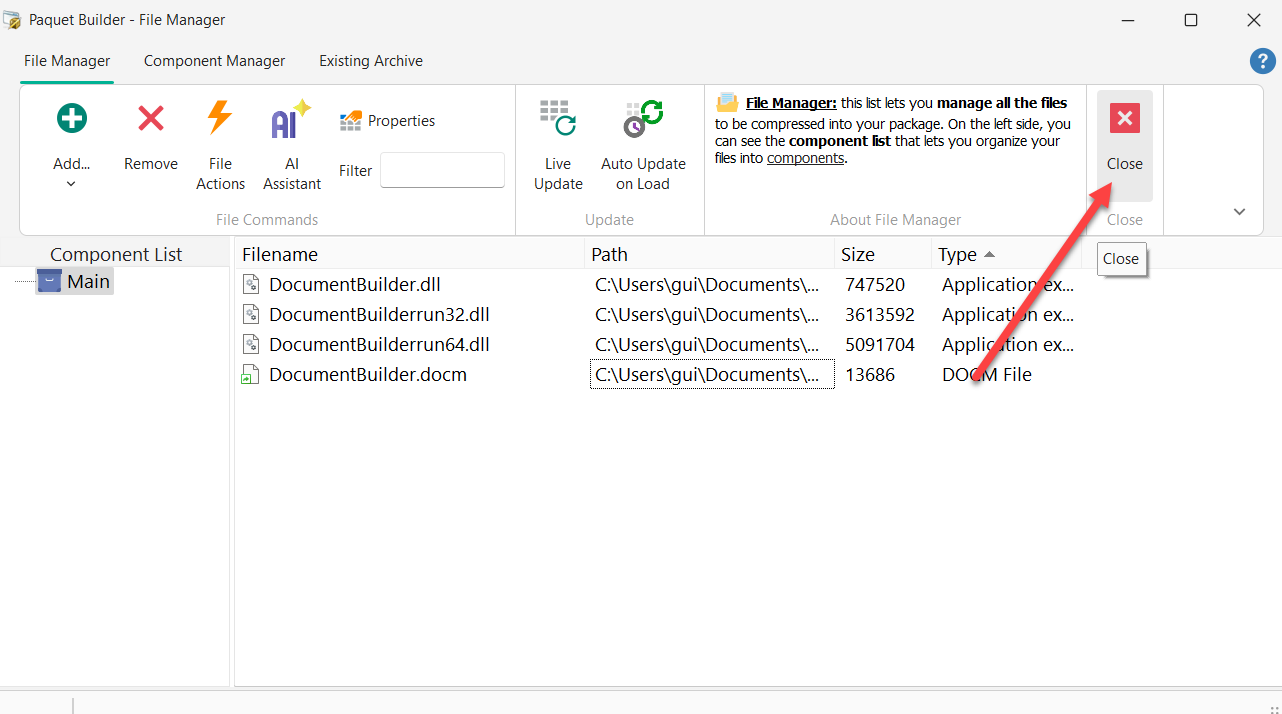
Once your files appear in the list, click Close to return to the main project view.
-
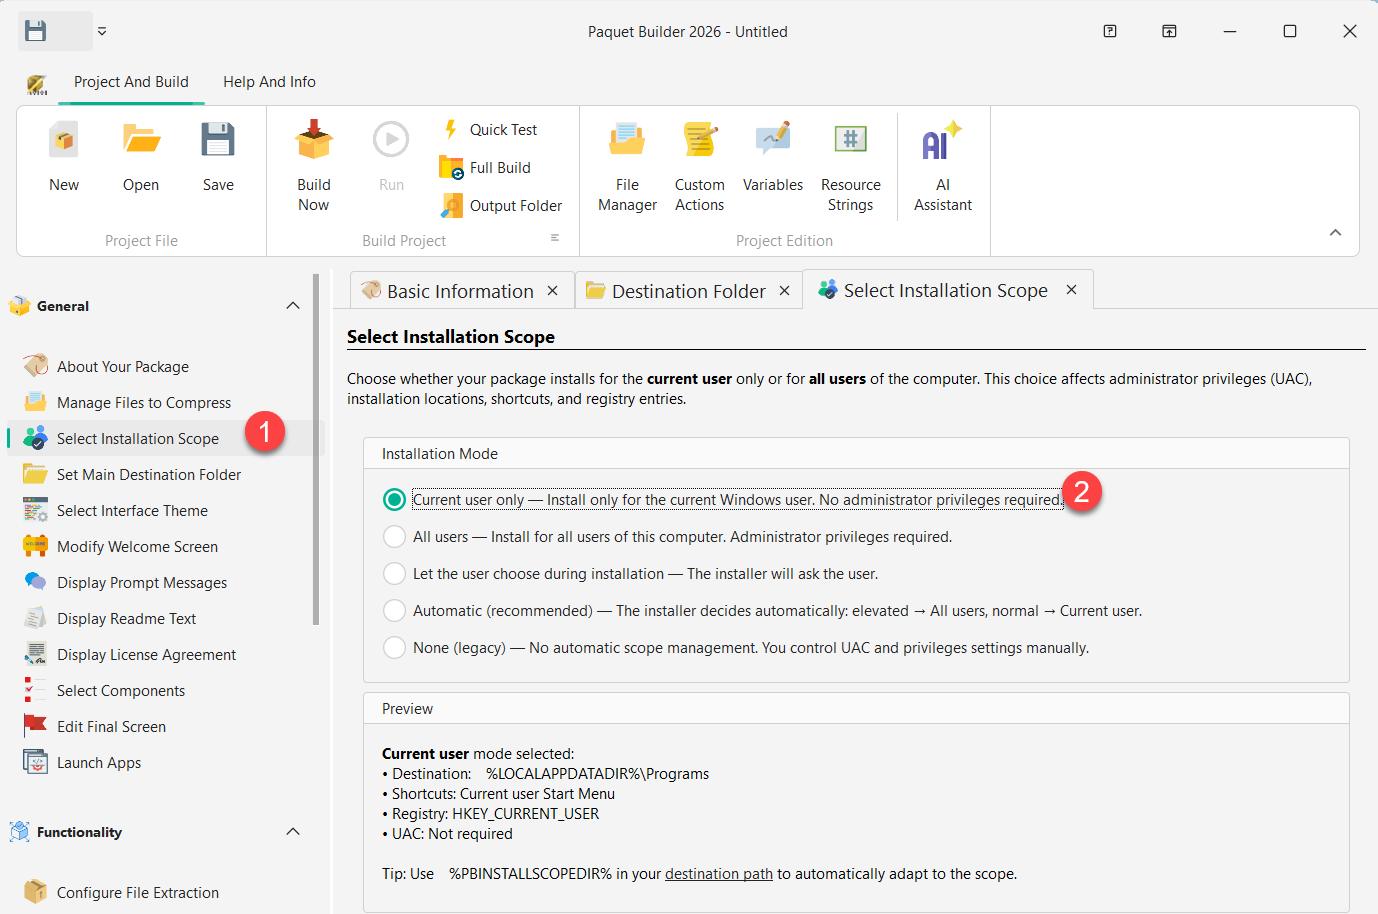
Select the installation scope
Navigate to General > Select Installation Scope. Choose whether the package installs for the current user only or for all users. This setting affects administrator privileges (UAC), destination paths, shortcuts, and registry entries.
For this tutorial, keep the default Current user only (no admin rights are required).
-
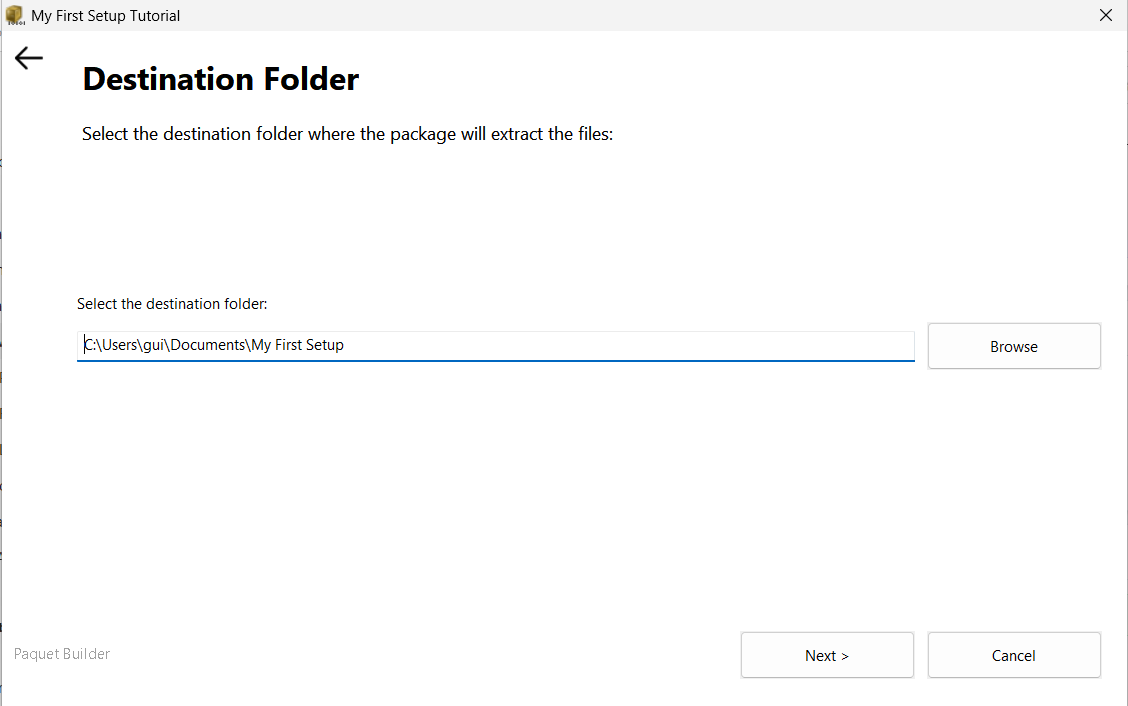
Set the destination folder
Navigate to General > Set Main Destination Folder. Enter the path where your files will be unpacked on the end user’s machine. Use the
%PBINSTALLSCOPEDIR%variable so the path adapts automatically to the installation scope you selected.%PBINSTALLSCOPEDIR%\Your AppFor a current-user install, this resolves to something like
C:\Users\John\AppData\Local\Programs\Your App.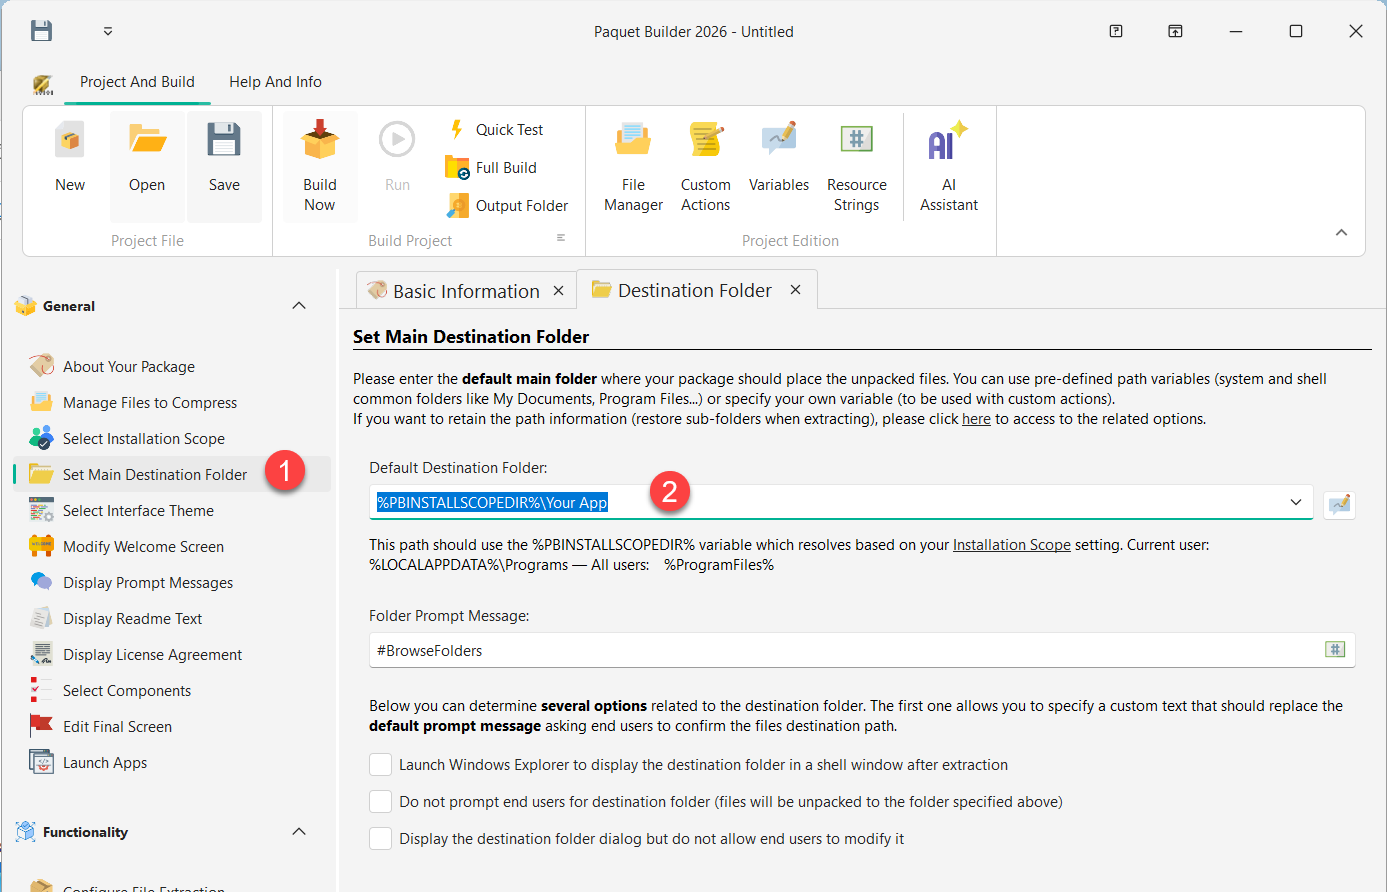
-
Add a welcome screen (optional)
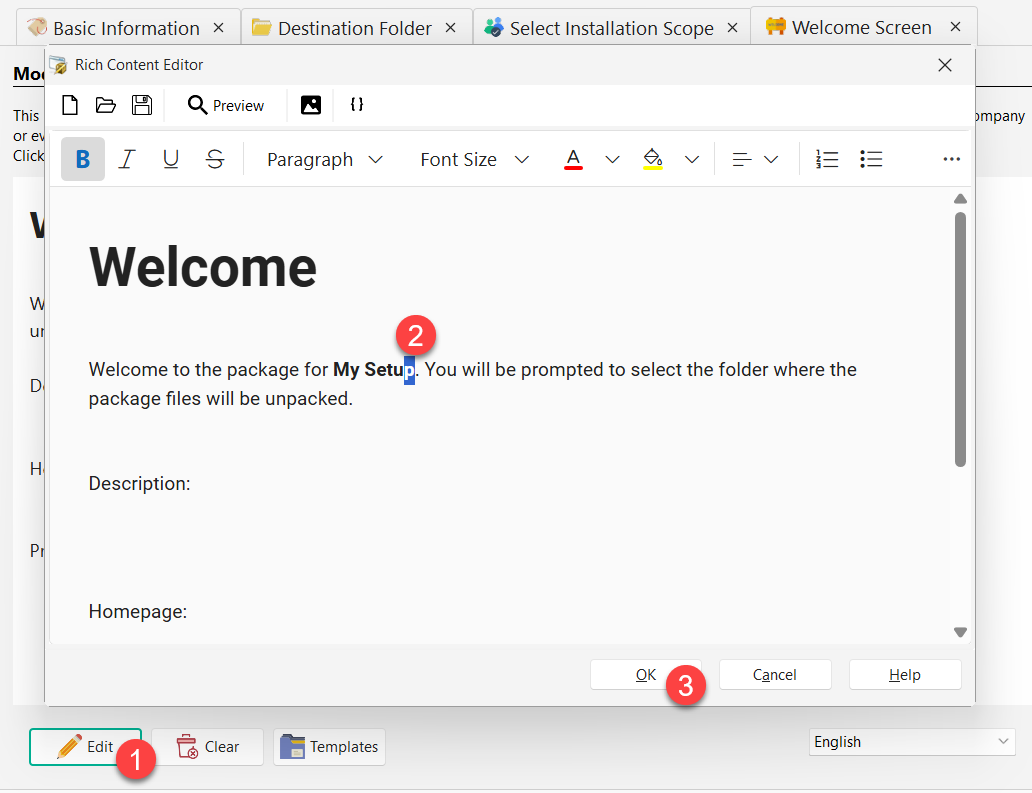
Navigate to General > Modify Welcome Screen. Choose Template > Package files will be extracted, then click Edit to open the Rich Content Editor.
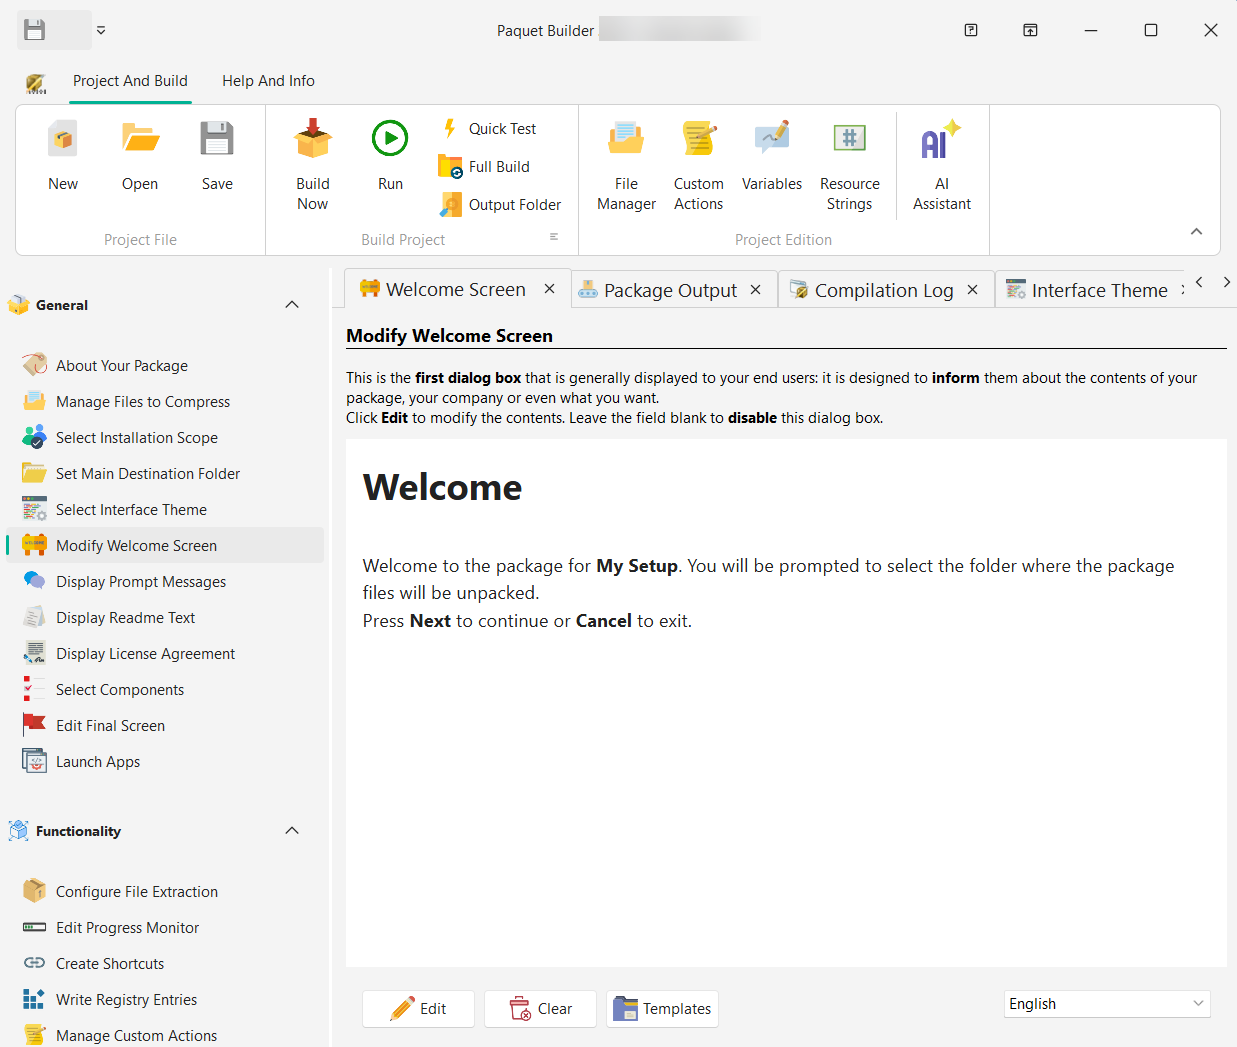
Write a short welcome message. The title and body text are fully customizable with rich formatting. Click OK when done.
-
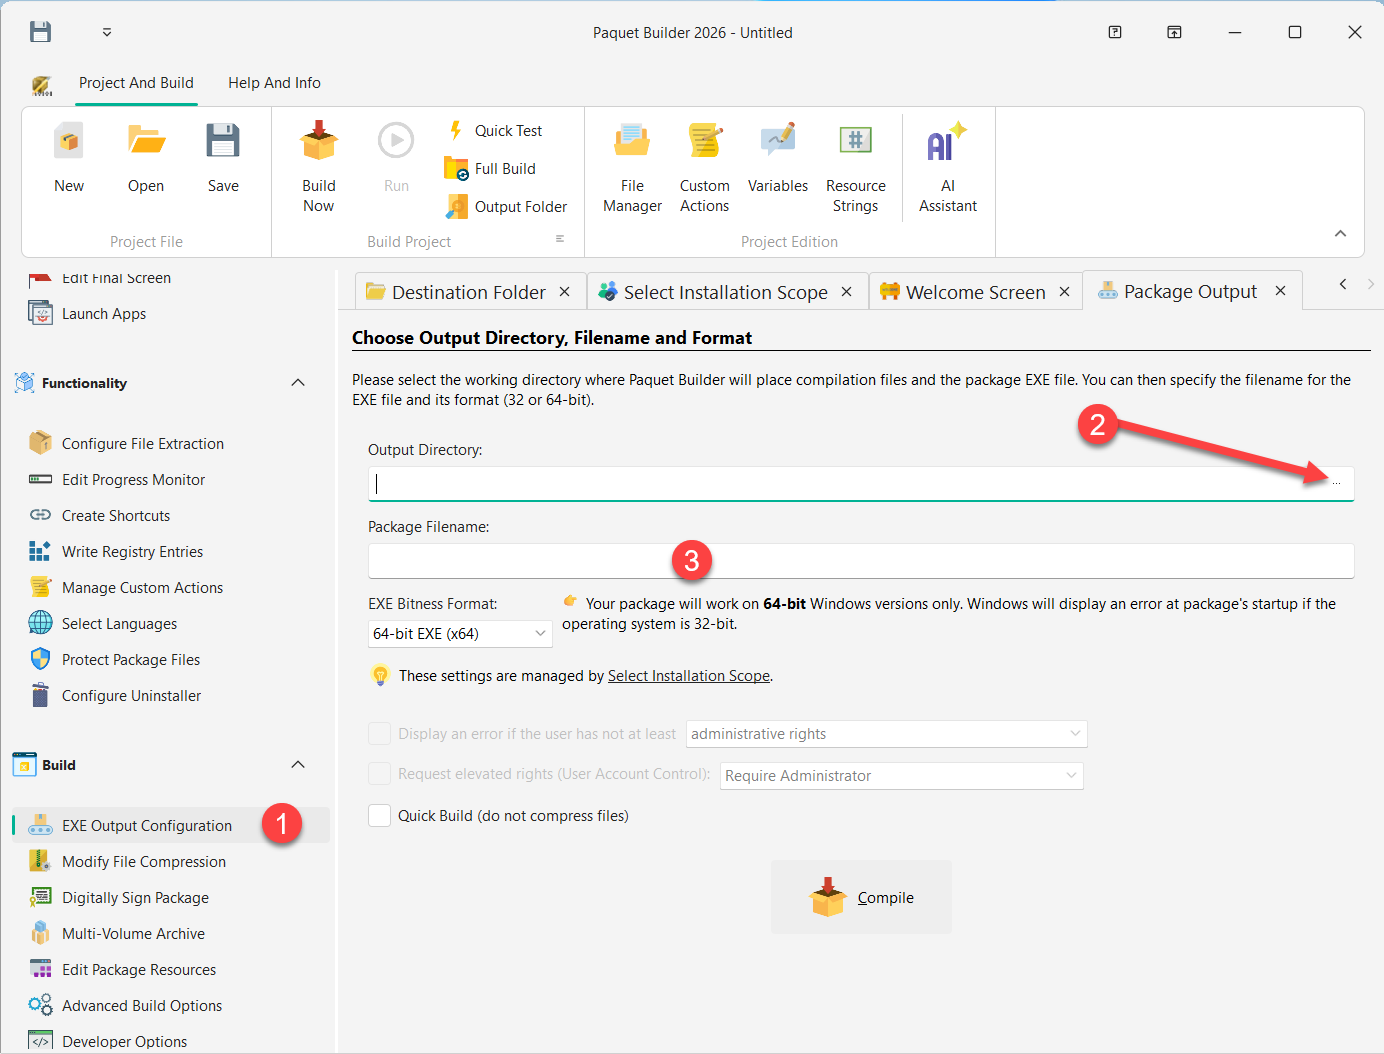
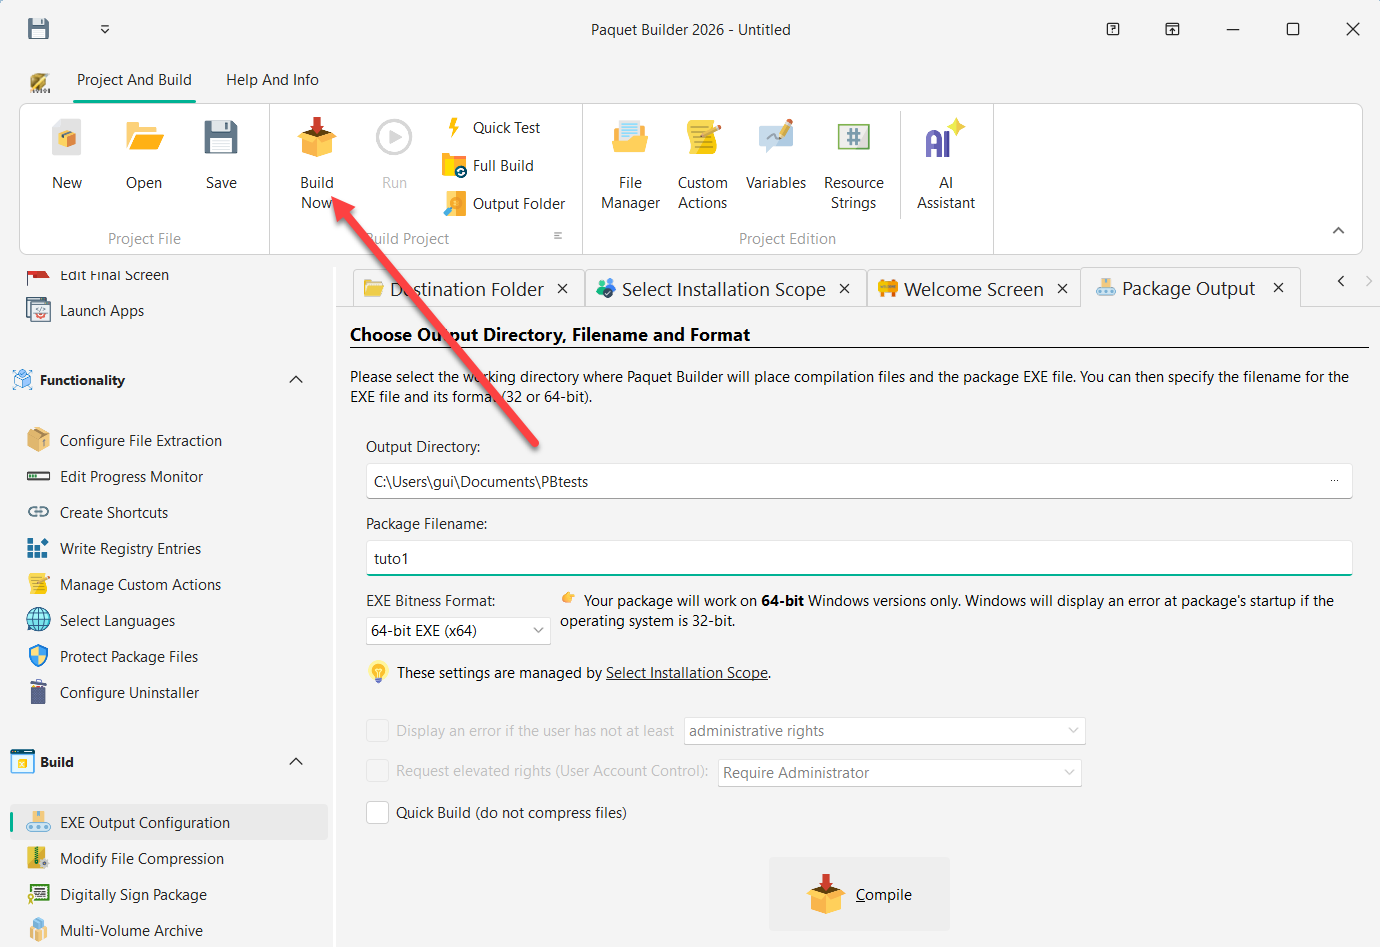
Configure the output and compile
Navigate to Build > EXE Output Configuration. Set the Output Directory (where the compiled file will be saved) and the Package Filename.
Click Build Now in the toolbar (or press the Compile button at the bottom of the page) to build the package.
-
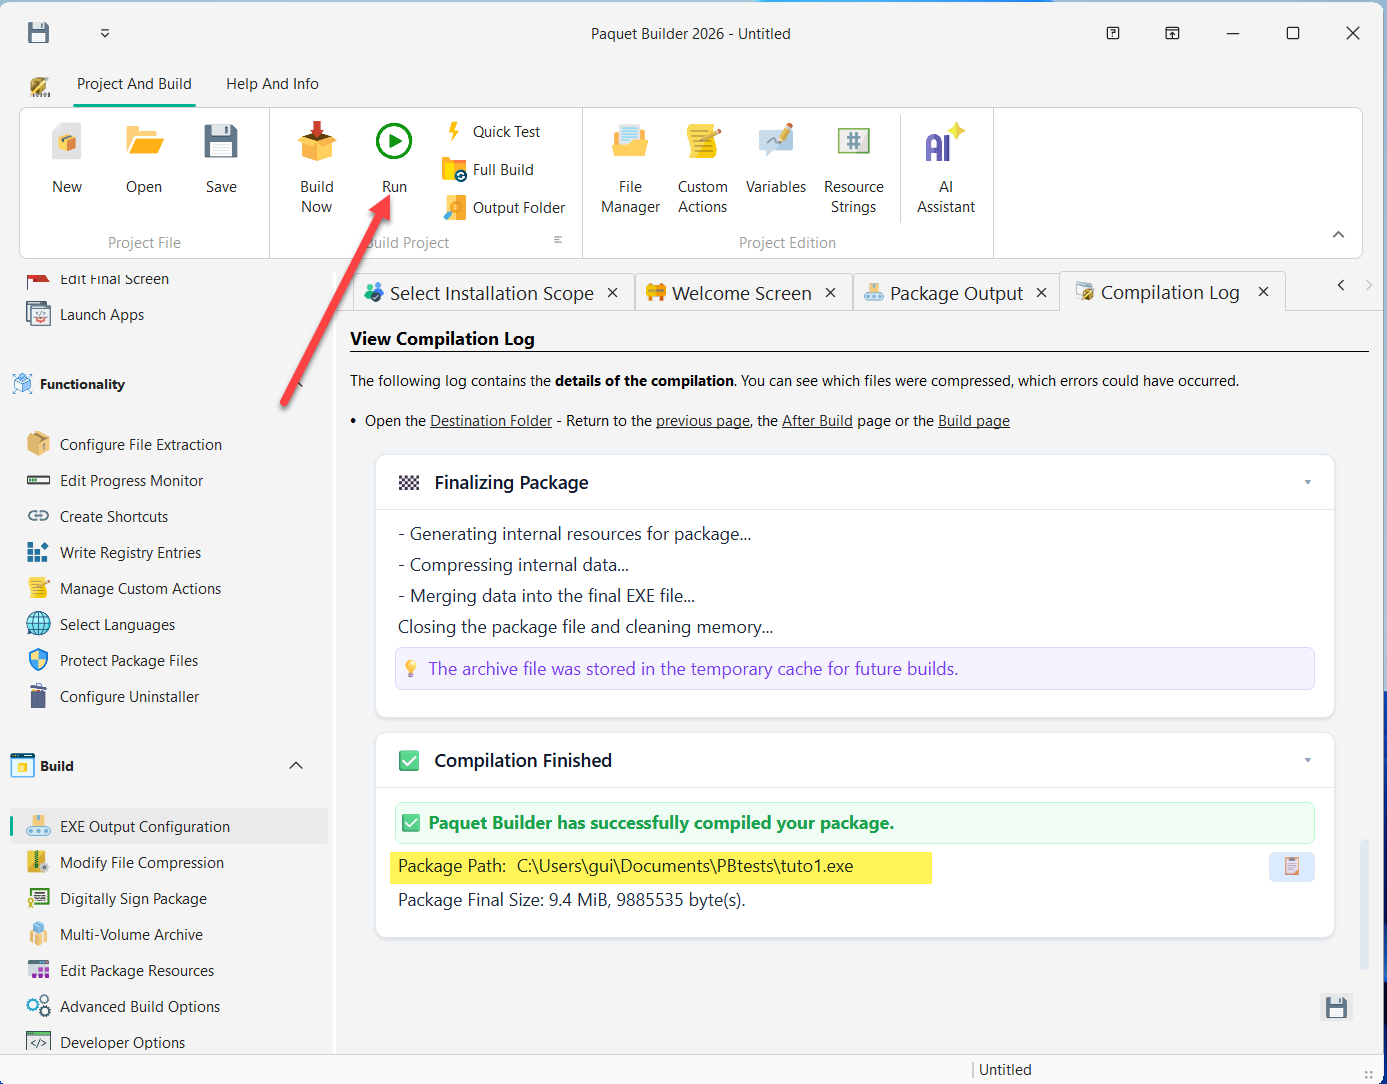
Check the compilation result
The Compilation Log tab opens automatically. When the build succeeds, you see a green confirmation with the package path and final file size. You can now click Run in the toolbar to test it.
-
Test the result
Running the compiled
.exelaunches your package. The end user sees the Welcome Screen you configured: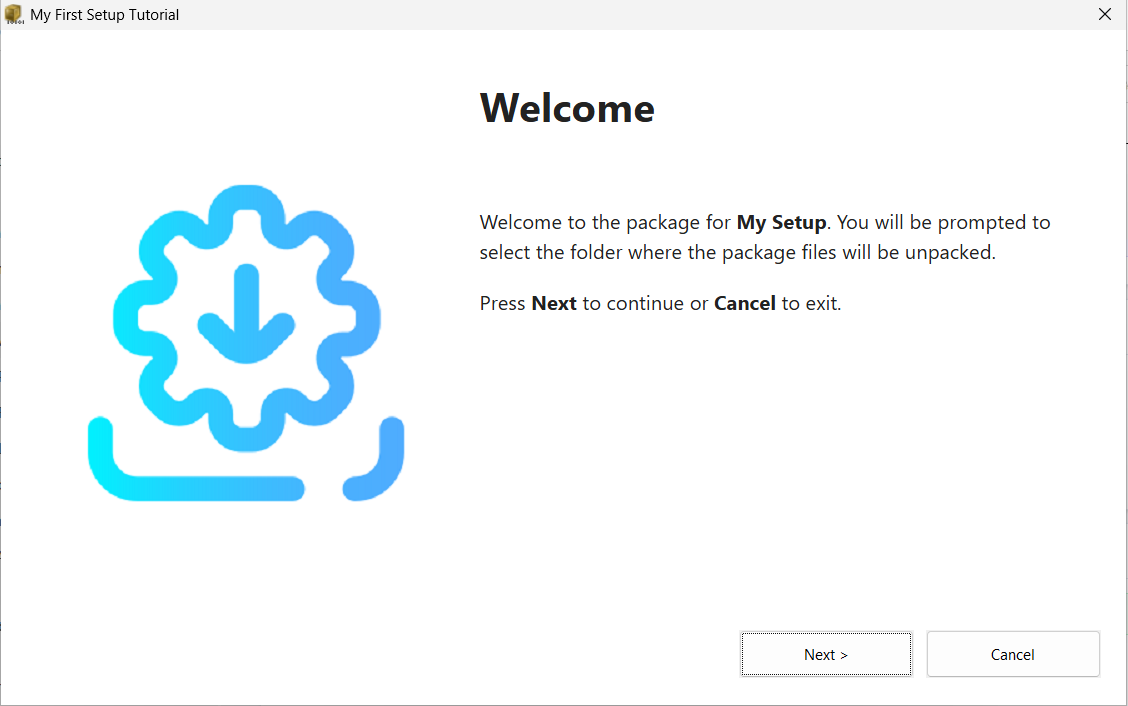
After clicking Next, the user is prompted to confirm or change the Destination Folder before extraction begins:
Once the package builds successfully, you can continue by customizing the package appearance, adding additional screens, or enabling more advanced behavior.