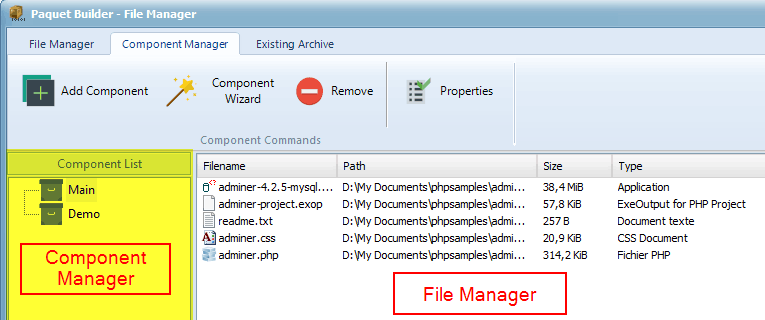
Manage files to compress
The file manager is the heart of Paquet Builder: it lets you specify the files you want to be compressed and delivered by the package. The window is divided into two sections: on the left side you can see the component manager, and on the right side is the "true" file manager.
Components are special categories that you can define in order to group related files together. First, learn more about components in Paquet Builder.
Working with the component manager
In the "Component Manager" ribbon:
To add a new component to the component list, press the Add button and you will be prompted for a new component title.
To remove an existing component from the list, select it and press the Remove button.
Components have properties: use the Properties button to edit the properties of a selected component.
To let Paquet Builder create components automatically, click the Auto-Create component button.
Finally if some components are source folder-linked, you can force them to be refreshed by clicking the List Refresh button.
You can also use the mouse context menu (right click on a component) to access options as "Rename Component" in addition to the previous ones.
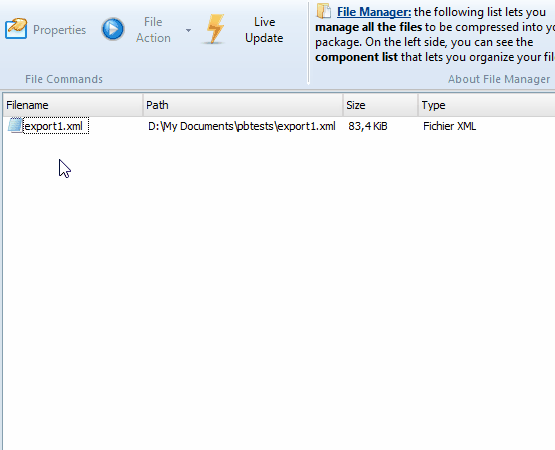
Working with the file manager
Select a component first; then you can manage the files that belong to the latter. When you select a component, Paquet Builder first loads the list of files that are already included into the component: each time a change is made (files added or removed for instance), the component's file list will be automatically saved.
Adding/removing files
The file manager works exactly like Windows Explorer: the list view displays the full paths to the files that are part of the selected component.
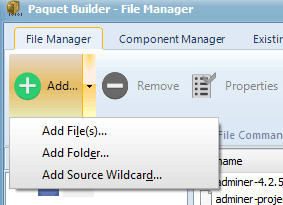
To add files to the list, press the Add button and select an option: you may add single or multiple files, entire folders and custom wild cards. Just select the appropriate action when you click the Add button:
For example, selecting "Add Wildcard" will open this window:
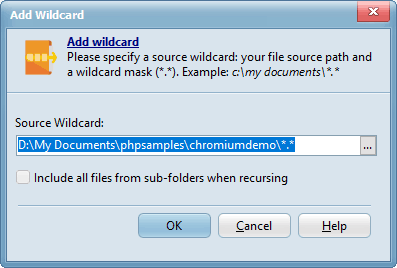
You can enter a path and specify which files should be added using a mask: in the situation shown on the screenshot, only text files including the ones from the sub-folders of C:\My Documents\Plus will be added.
Or you may rather add entire folders (including their sub-folders or not) using the "Add Folder" command.
To remove a file from the list, select it and press the Remove button.
Finally, to clear the entire file list, click the Clear button. You can select multiple files by pressing Ctrl+Click or Shift+Click.
To open a file, just select it and click using the mouse's right button on its icon, select Open in the context menu and the associated program will be launched in order to open it.
Drag/drop operations
Paquet Builder supports drag/drop operations from Windows Explorer and other shell windows. Select all the files in the explorer, drag them onto the manager's file list and they are automatically added to the list.
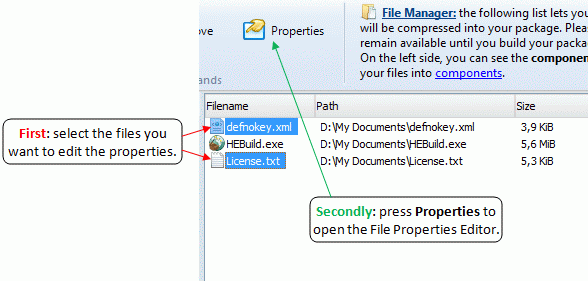
Setting file properties
Please see this topic for further description and demonstrations about working with file properties.
You can edit file properties by first selecting a single file or a group of files (like in Windows Explorer); then click the Properties button or use the context menu command "File Properties", or even double-click on files.
Sorting files
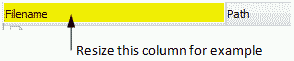
Paquet Builder displays information about each file: filename, full path (path to folder+filename), file type, size... If you need to sort your files according to a specific data (for example, file types), just click the associated column. You may also resize the different columns:
Filtering files
You can filter files by entering a mask into the "Filter" field. For instance, to display .EXE files only, enter *.EXE. To show all files with an extension that begins with c, enter *.c*.
Using the context menu
All of the previous commands are also available from the context menu: click the list with the mouse's right button to display it. It contains additional commands not directly available such as "Select All" or "File Information". The last command gives you global information about the package files (total size, number of files...). Finally, the "File Properties" command will display the "Properties" dialog available in Windows Explorer (lets you access the properties of the selected file).
A special command named "Create a shortcut to..." allows you to quickly create shortcuts to the selected file(s). These shortcuts can be edited later with the shortcut manager.
File Actions
This button displays the context menu as explained above. But it also includes features dedicated to shared and COM/ActiveX files.
Register as ActiveX / COM Server
This menu creates a similar custom action to "self-register" the selected file(s) (it must be an executable or DLL file!). Thus, the ActiveX control, COM server component... can be found by other COM applications.
The custom action is created in the After File Extraction event. You can customize it later if you wish.
Register as shared DLL file (ActiveX, COM...)
This menu creates a similar custom action to indicate to the OS that the file may be shared by several applications, and therefore should not be removed if still used.
Similarly, the custom action is created in the After File Extraction event. You can customize it later if you wish.
During uninstall, if a file was previously self-registered (using the option above), the uninstaller first checks whether the file is still used by other applications or not. If yes, the file is left untouched. Otherwise it is first unregistered and then safely removed.
Including sub-folders
When you add a folder or a source wildcard, Paquet Builder has two choices: just add the files from the selected folder, or also include the files from sub-folders. You will be prompted whether you want to include sub-folders or not.
You can also configure the current component to include sub-folders if you use live-update.
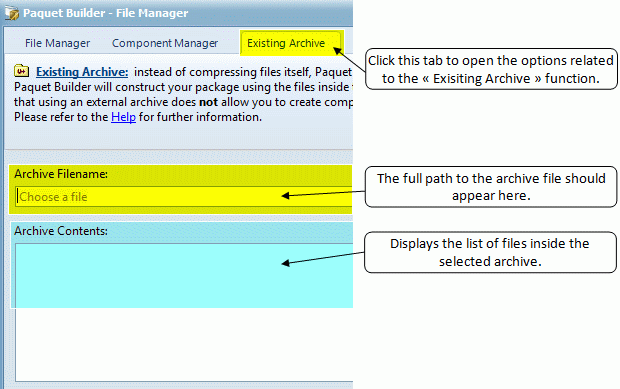
Using an existing archive
Paquet Builder allows you to use an existing 7-zip archive (.7z extension) instead of independent files as the main file source for your package. Just select the tab named "Existing Archive" and then specify your archive. You can also preview its contents.
Warning
Paquet Builder will ignore files that may have been added to components if you specify an existing 7-zip archive. A warning will be issued in the compilation log.
Using external archives is not recommended especially if you work with components. This feature should be used in case of small projects or if you want to change an existing archive into a Self-Extracting archive for distributing it to someone who does not have the right decompression tool.
Warning
This feature is not compatible with the multi-volume archive option.
Tip
The "Existing Archive" feature is especially used by the Paquet Builder shell extension for Windows: if you have this free add-on (use the Web Update tool), you can convert existing 7-Zip archives into Self-Extracting packages directly from Windows Explorer (and with no need to create a project).