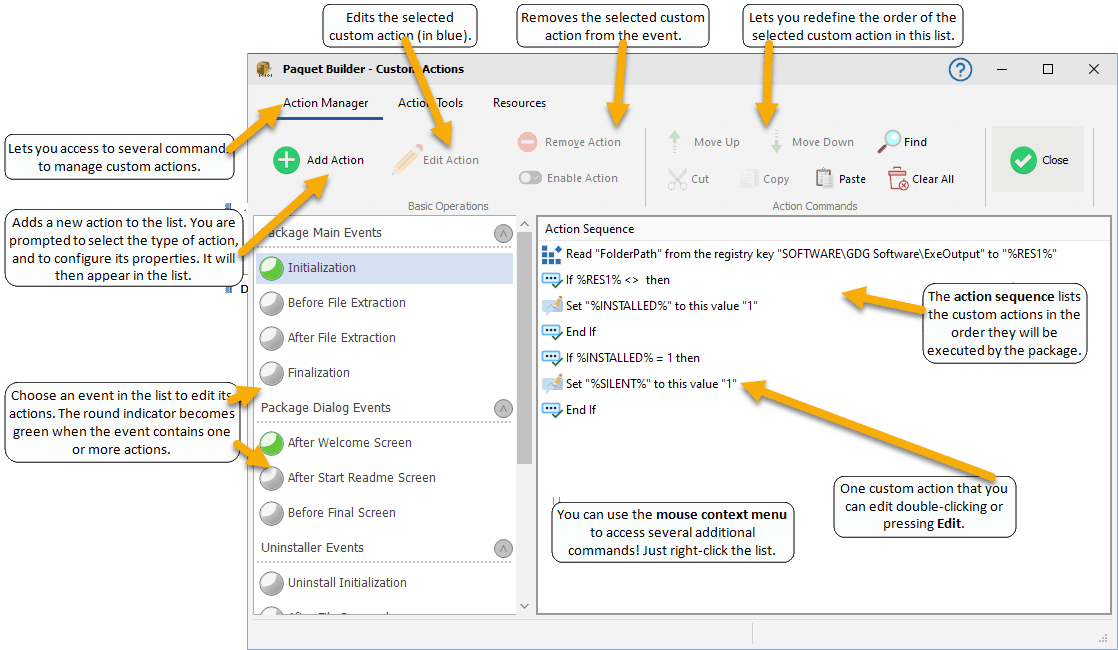
Manage Custom Actions
This topic describes how the custom action editor works in Paquet Builder and lets you manage your custom actions (add, remove, edit properties, import / export templates...)
Functionality
-
To add an action to the list, press the Add Action button: see below.
-
To remove an action from the list, select it and press the Remove button. You will need to confirm your choice.
-
To modify an action’s settings, select the field and press the Edit button (you can also double-click it).
-
To reorder the actions, you can use drag/drop operations or work with the Move Up and Move Down button.
-
You can enable or disable one or more actions using the "Enable (or disable) Action" button. These will appear crossed out in the editor and will be ignored at the time of compilation. This feature is useful when you make tests for example without having to delete the actions.
-
To search for a given text in custom actions, click Find and enter the text you want to find. The search begins from the selected custom action (if any). To search further, click Find again. Search automatically highlights searched text in custom action list. To remove this highlighting, change the event or click Find again (and click Cancel).
-
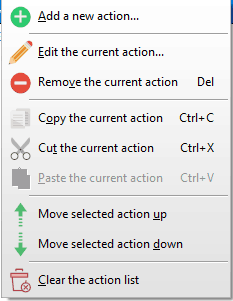
The Custom Action Editor has also its own mouse context menu: click with the mouse's right button on the action list and a context menu with several additional commands will appear. You can perform clipboard operations like cut, copy and paste actions; the last feature is especially useful if you wish to add the same action type several times and just modify one property.
The custom action editor's window may be resized: its state and size are saved and automatically restored.
Warning
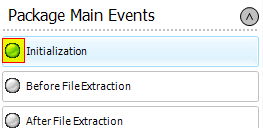
When an event contains one action at least, its associated LED is green. Otherwise, it is off.
Adding custom actions
- First you need to select the appropriate event in the list on the left side.
-
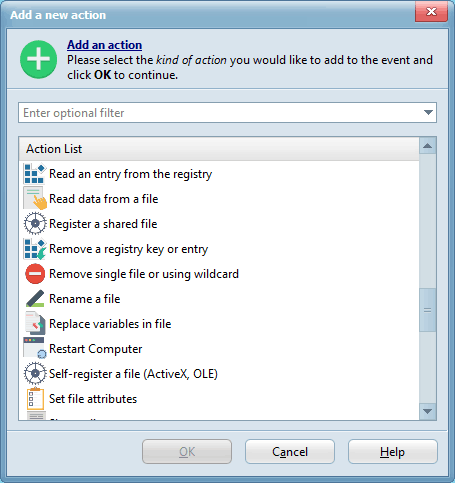
After pressing the Add Action button, a dialog box with the list of all available custom actions will appear. In that list select the action you would like to add to the selected event. Then click OK.
-
The Action Properties Editor appears and lets you set up the different properties of your action. Through its value a property tells the package how the custom action should work. Just see this sample: take the Create a folder action, it contains the property called "FolderName". You set the value of this property to the folder that the custom action will create. So when the package runs, it sees the custom action "Create a folder", so it knows it should create a new folder; but which folder? It finds the answer by reading the value of the "FolderName" property. Now it can create the folder and continue its execution.
- Finally press OK and the new custom action will appear in the action sequence list of the selected event.
Info
You can filter custom actions by entering a filter (a word or some letters) to instantly get access to the custom action you want to add.
Action Tools
Note
All common operations have shortcuts: CTRL+A will add a new action, CTRL+C will copy the custom action to the clipboard, PAGE KEY DOWN will jump to the next event; DEL will remove selected actions.
Import and export custom actions
You can import/export custom actions from/to external files using the Action Tools ribbon.
When you export custom actions, Paquet Builder will display a list of all custom actions in the selected event:
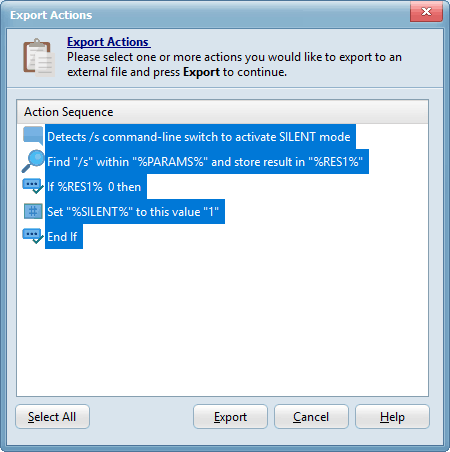
Highlight the custom actions that you want to export (use your mouse and the SHIFT or CTRL keys to select/unselect custom actions). Only highlighted custom actions will be exported. By default all custom actions of the event are selected.
Then press Export and you will be prompted to select the file where the selected actions will be saved. Paquet Builder Action files are stored in XML format.
When you import custom actions, Paquet Builder will ask you to select the external action file (.XML) to import. Then it will show you the same dialog box as above, except that this time you will have to select the actions you want to import into the selected event.
Once your actions are selected, press Import and they will be imported into the current event. Please note that existing custom actions are not overwritten, even if they have the same name (and purpose).
Copy and paste block of actions
You can copy a block of custom actions: Paquet Builder only allows a single action to be selected each time so if you want to copy several actions in one time (instead of selecting all actions one per one and copy/paste them), use the "Action Tools|Copy Block" ribbon command.
Paquet Builder will display a list of all custom actions in the current event (like on the previous screenshot): then highlight the custom actions that you want to copy (use your mouse and the SHIFT or CTRL keys to select/unselect custom actions). Only highlighted custom actions will be copied. By default all custom actions of the event are selected. Then press Copy and Paquet Builder will save custom actions to the clipboard.
After having copied a block of custom actions, you can paste it: select "Action Tools|Paste Block" ribbon command. Paquet Builder will show you the same dialog box as above, except that you will have to select the actions you want to import into the selected event.
Once your actions are selected, press Paste and they will be imported into the current event. Please note that existing custom actions are not overwritten, even if they have the same name (and purpose). You can then modify these new actions.
Tip
It is possible to copy/paste custom action samples from this help and/or other places like our forum with this method.